

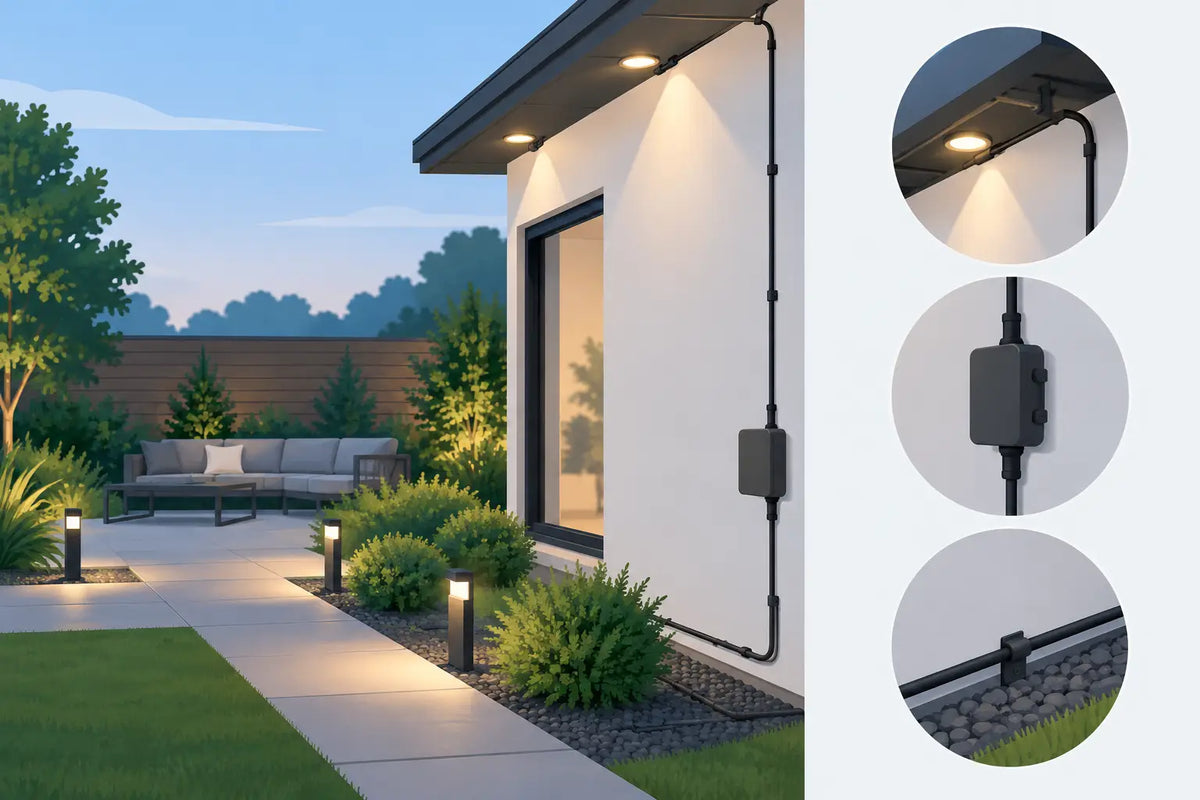
A permanent outdoor lighting install can look polished from the street and still be one loose cable away from trouble. The difference is usually planning, not luck. This outdoor LED cable routing guide focuses on the parts that affect the finished look and long-term performance: where cable runs begin, how they cross architectural transitions, where connections stay protected, and how to leave enough service slack without creating visible loops.
For Govee permanent outdoor lights, the cable is part of the installation, not an afterthought. A clean route protects your investment from sun, water, wind, and accidental snags while keeping every light aligned where it belongs.
Outdoor LED Cable Routing Guide: Plan Before Mounting
Start with a full walk-around of the house before peeling adhesive or installing a single mount. Identify the controller location, power source, first light, roofline sections, gables, soffit changes, corners, and any areas where the run must jump over a gap. Measure the actual path the cable will follow, not the straight-line distance from one point to another.
This step matters because cable length disappears quickly around corners, dormers, downspouts, and architectural offsets. A run that appears short from the ground may need extra length to stay tucked against the soffit and avoid a visible diagonal. Plan the route so cable follows the house's existing lines whenever possible. Fascia edges, soffit seams, trim boards, and vertical corner boards give you natural places to conceal and secure it.
Choose a controller location that is close enough to reduce unnecessary cable length but protected from direct weather exposure. Keep it accessible for resets, troubleshooting, and future adjustments. Do not bury a controller behind trim or place it where irrigation, standing water, or runoff regularly reaches it.
Before installation day, verify four things:
- The power source can be reached without using an unsuitable outdoor extension setup.
- The planned cable path does not cross a door, window, vent, or moving gate.
- Each connection can sit in a protected position with drainage below it.
- You have enough lights, extensions, mounts, and cable-management hardware for the complete route.
Route Cables Along Structure, Not Across Open Space
The cleanest route is usually the one that follows the home. Run cable parallel to the soffit, behind a fascia return, or along a trim seam instead of taking the shortest path through open air. An open span catches the eye, moves in wind, and is more likely to snag during maintenance.
At a corner, give the cable a gradual turn rather than forcing a sharp bend. Outdoor LED cables are designed to flex, but repeated tension at one hard bend can stress the jacket or connector over time. Use mounting points near the turn so the cable is supported before and after the corner.
Gables require extra attention because the roofline changes direction. Measure both slopes independently, then plan where the cable will transition at the peak. If a cable must cross from one architectural plane to another, keep the crossing as short as possible and place it where the trim naturally hides it.
Avoid routing behind gutters where water, leaves, and ice can collect. Also avoid areas where roofers, gutter cleaners, or window washers are likely to pull, step on, or catch the wire. A concealed cable is useful, but a concealed cable that cannot be inspected or serviced is not always the best choice.
Keep the cable supported
Adhesive alone is rarely the full answer for a permanent exterior installation. Heat, textured surfaces, paint condition, moisture, and wind all affect how well factory adhesive performs. Purpose-built mounts add mechanical support and help maintain consistent light placement when adhesive is not enough.
Use mounts or appropriate exterior-rated cable supports at intervals that prevent sagging. The exact spacing depends on cable weight, the length of unsupported run, and local weather conditions. Short, straight sections may need less support than a long run across a breezy gable or a transition near a corner.
For Govee installations, product-specific mounts also help preserve the spacing and aiming of individual lights. PrintWorks 3D mounts are designed for homeowners who want a cleaner, more permanent fit than stock mounting hardware can provide, especially around rooflines and challenging soffit layouts.
Protect Connections From Water and Tension
Connections deserve more thought than the light sections themselves. Whenever possible, place connectors under an eave, behind trim, or in another sheltered location. Do not leave a connector hanging freely where it can swing in wind or sit against a wet surface.
Create a small drip loop below a connection when the cable approaches from above. This is a simple downward curve that gives water a place to drip before it can track along the cable toward the connector. The loop should be gentle, supported, and discreet, not a large coil hanging below the roofline.
Never pull cable tight against a connector. Leave a modest amount of service slack near controllers, extensions, and section transitions. That slack makes future troubleshooting possible and keeps the connection from carrying the tension of the entire run. The goal is controlled slack, not extra cable stuffed into a visible bundle.
Use only accessories and connection methods approved for your specific Govee system. Do not cut, splice, pierce, or modify proprietary light cables unless the manufacturer explicitly permits it. An improvised splice may create water entry points, inconsistent performance, or warranty problems.
If you need to pass cable through an exterior wall, use an appropriate weatherproof pass-through method and seal the penetration correctly. If the work involves line-voltage wiring, new outdoor receptacles, or uncertainty about local electrical code, bring in a licensed electrician. The low-voltage light run may be DIY-friendly, but the power source still needs to be safe and code-compliant.
Handle Excess Cable Without Creating an Eyesore
Extra cable is common near controllers, at the end of a run, and where a standard extension is longer than the gap it bridges. Do not wrap excess cable tightly around a controller or leave it coiled on a roof edge. Tight coils look unfinished, hold moisture and debris, and make service harder.
Instead, make a loose, controlled coil in a dry, sheltered area and secure it so it cannot move. Keep bends broad. If the excess is minimal, route it back along trim for a short distance rather than creating a coil at all. The right choice depends on the available hiding space and whether you may need access later.
Be especially careful near the end of a lighting run. The final cable tail should be secured, tucked away from weather exposure, and kept clear of moving parts. A loose end can tap against siding in the wind, catch debris, or become the first thing damaged during exterior maintenance.
Common Cable Routing Mistakes to Avoid
The most frustrating installation issues usually start with a few avoidable shortcuts. Running cable across the face of siding may be faster, but it is harder to hide and more exposed to UV, wind, and accidental contact. Pulling every section tight can make the install look crisp on day one, then place stress on connectors as temperatures shift.
Another common mistake is routing before confirming light spacing. Mount the lights according to the planned layout first, then route the cable in a way that supports that spacing. Trying to make the cable dictate where each light sits often creates uneven illumination and awkward gaps.
Finally, do not ignore the service path. Ask how you would reach a controller, connection, or failed section without removing half the installation. A permanent-looking setup should still be maintainable. Accessible does not mean obvious. It means you can solve a problem without turning a small repair into a weekend project.
Check the Route Before Finalizing It
Before you commit every mount and cable support, power on the system and inspect it from the ground at dusk. Look for hanging loops, exposed connector locations, crooked light sections, and cables that break the clean line of the house. Then inspect the route up close for pinched wire, sharp edges, unsupported transitions, and areas where water may collect.
A few extra minutes of adjustment is far easier than returning to a ladder after the first storm. Build the route around the home, support the cable where it needs help, and leave every connection with room to stay dry, secure, and serviceable. That is what makes permanent outdoor lighting feel permanent.
Share:
Govee Brackets for a Cleaner Permanent Install
Vinyl Soffit Fasteners for Permanent Lights