

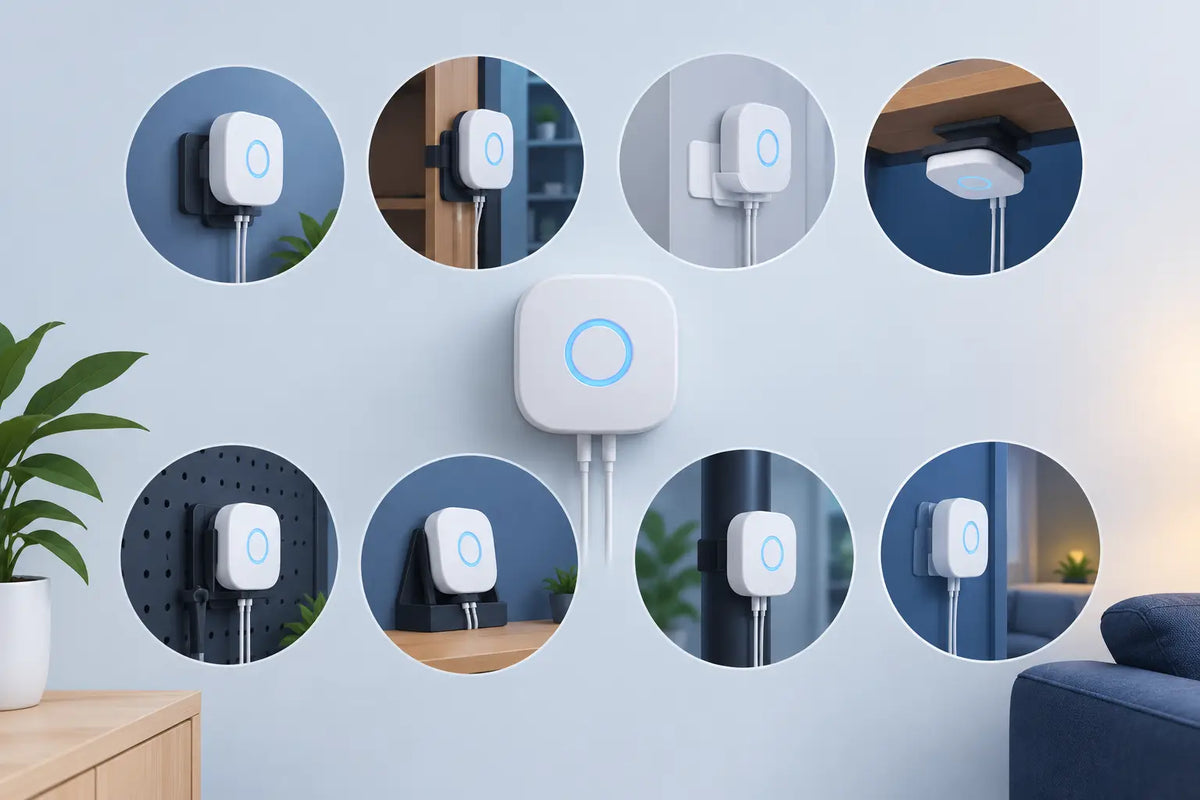
A controller hanging by its cable can make an otherwise clean permanent lighting install look unfinished. Worse, it can put strain on connections, collect water in the wrong place, and become difficult to reach when you need to reset or troubleshoot your lights. These Govee controller mount ideas help create a secure, accessible setup that looks intentional from day one.
The best location depends on your power source, the cable run, your home’s exterior, and the specific Govee system you own. The goal is not simply to get the controller off the ground. It is to protect the equipment, manage the wiring, and preserve easy access without putting a bulky box in the middle of a visible wall.
Start With the Controller’s Environment
Before choosing a mounting method, check the manufacturer guidance for your controller and power supply. A mount can be weather resistant, but that does not automatically mean the electronics themselves are approved for direct rain, standing water, or extreme heat.
Look for a location that stays as dry as possible while keeping the controller within reach. Under an eave, inside a covered porch cabinet, on a protected garage wall, or within a properly rated exterior enclosure are usually stronger choices than an exposed fascia board. Keep the controller off the roof, away from sprinkler spray, and clear of areas where snow or leaf buildup can trap moisture.
Cable direction matters too. Plan for wires to leave the controller without sharp bends, pulling, or dangling loops. A clean route protects the connections and makes future maintenance much easier.
8 Govee Controller Mount Ideas for a Cleaner Install
1. Mount It Under a Protected Eave
An under-eave location is often the simplest answer for permanent outdoor lights. It keeps the controller tucked out of the main sightline while using the roof overhang as a first layer of protection from rain and sun.
Mount the controller vertically or horizontally based on cable orientation and available clearance. Leave enough room around it to plug in connectors, press buttons, and remove the unit if needed. This approach works especially well near a garage-side outlet or a covered patio outlet.
2. Use a Purpose-Built Wall Mount
A controller mount designed around the shape of your Govee unit creates a more secure result than improvised straps, tape, or a generic shelf. The right fit holds the controller in position, reduces cable strain, and gives the installation a finished appearance.
This is a practical choice when the controller needs to sit on siding, trim, a post, or a garage wall. Product-specific mounts from PrintWorks 3D are built for the real dimensions and installation needs of Govee lighting equipment, helping homeowners avoid the looseness and awkward placement common with universal solutions.
3. Place It Inside a Weather-Rated Enclosure
If your ideal controller location is exposed, an exterior-rated enclosure can provide an added layer of protection. Choose an enclosure large enough for the controller, power connections, cable routing, and airflow. A cramped box may make resets and service frustrating.
This option is especially useful on homes with limited covered space. Use properly sized cable entry points and seal them correctly, but do not create a fully packed, heat-trapping compartment. Electronics need reasonable clearance, particularly in hot climates or on sun-facing walls.
4. Attach It to the Garage Interior Near the Exit Point
For many installations, the cleanest controller location is inside the garage. Mount it near the wall or ceiling where the lighting cable exits the building, then use an appropriate pass-through point to route the cable outside.
The trade-off is that the cable path may require more planning, and you need to protect the exterior penetration from water and pests. In return, the controller stays in a more stable environment, out of direct weather, and easy to access without a ladder.
5. Mount It on the Back Side of a Porch Column
A porch column can hide a controller in plain sight. Mounting it on the side facing the house or the rear of the column keeps the equipment less visible from the street while placing it near a protected outlet.
Confirm that the column material can accept the fasteners you plan to use. Vinyl wraps, hollow columns, and thin trim may need a different mounting strategy than solid wood or masonry. Also make sure the controller is not located where people, furniture, or landscaping equipment can bump it.
6. Build a Small Service Board
A painted PVC board, sealed exterior panel, or neatly finished backer board gives you one organized place for the controller, power equipment, cable clips, and an enclosure if required. It is a smart option when your installation includes multiple components and you want the wall itself to stay uncluttered.
Mount the board first, then attach each component with enough spacing for connectors and airflow. A service board is also easier to replace or update than drilling additional holes into siding every time your setup changes.
7. Tuck It Behind a Privacy Screen or Utility Cover
Air-conditioning screens, trash enclosure walls, decorative utility covers, and privacy panels can conceal lighting controls without putting them inside a sealed box. This can be a good fit for a side yard where the outlet and cable route are convenient but the controller would otherwise be visible.
Leave adequate ventilation and service access. A decorative cover should hide the equipment, not turn it into a difficult-to-reach problem. Avoid placing the controller where it may be exposed to heat from HVAC equipment or where a gate can swing into it.
8. Create a Dedicated Smart-Home Equipment Zone
If you already have a structured area for cameras, irrigation controls, landscape-lighting transformers, or network equipment, adding your Govee controller there can keep exterior technology organized. A protected utility wall or cabinet can become the central point for multiple low-voltage systems.
This idea works best when cable lengths allow it. Do not force a controller location simply because it looks tidy if it creates unsupported cable spans, extension-cord dependence, or difficult routing around doors and windows. A clean install still needs to follow the product’s power and connection requirements.
Choose Hardware That Matches the Surface
The mount is only as dependable as the fasteners behind it. For wood trim, use exterior-rated screws that reach solid material rather than only thin fascia or decorative cladding. For masonry, use anchors designed for brick or concrete. For vinyl siding, avoid compressing or cracking the panel by using a mounting method that supports the load properly.
Adhesive can be useful for lightweight cable management in protected areas, but it is rarely the best primary solution for a controller exposed to changing temperatures. Heat, cold, moisture, and surface texture all reduce adhesive reliability over time. Mechanical fastening is usually the better choice for a permanent exterior installation.
Route cables with purpose. Support them at regular intervals, maintain gentle bends at connectors, and create a drip loop where a cable enters an enclosure or wall. That small downward loop helps keep water from traveling along the cable toward a connection point.
Keep Access Part of the Design
A hidden controller should not be a trapped controller. Before installing the final screws, imagine the first reset, firmware issue, power cycle, or seasonal inspection. Can you reach the buttons? Can you unplug the power supply? Can you see the connections without removing half the installation?
Leave clearance around the mount and label the power source if several devices share the area. Taking an installation photo before closing an enclosure can also save time later, especially when cables are routed behind trim or inside a service board.
A well-mounted Govee controller is one of those details that disappears when it is done right. It stays protected, the cables stay orderly, and your permanent lights remain the feature everyone notices - not the equipment required to run them.
Share:
Do Govee Lights Need Custom Brackets Outdoors?
Custom Govee Brackets for a Cleaner Install