
A Govee install can look sharp from the street or slightly off in a way you notice every time you pull into the driveway. That difference usually comes down to alignment. If you are figuring out how to align Govee light strings, the goal is not just getting lights up - it is getting a straight, consistent line that looks intentional in daylight and clean at night.
For permanent outdoor lights, alignment problems usually show up in three places: spacing that wanders, modules that tilt at different angles, and roofline transitions that drift as you move around corners or peaks. The frustrating part is that even a high-end lighting system can look uneven if the mounting method allows too much movement. A polished result starts before the first light is attached.
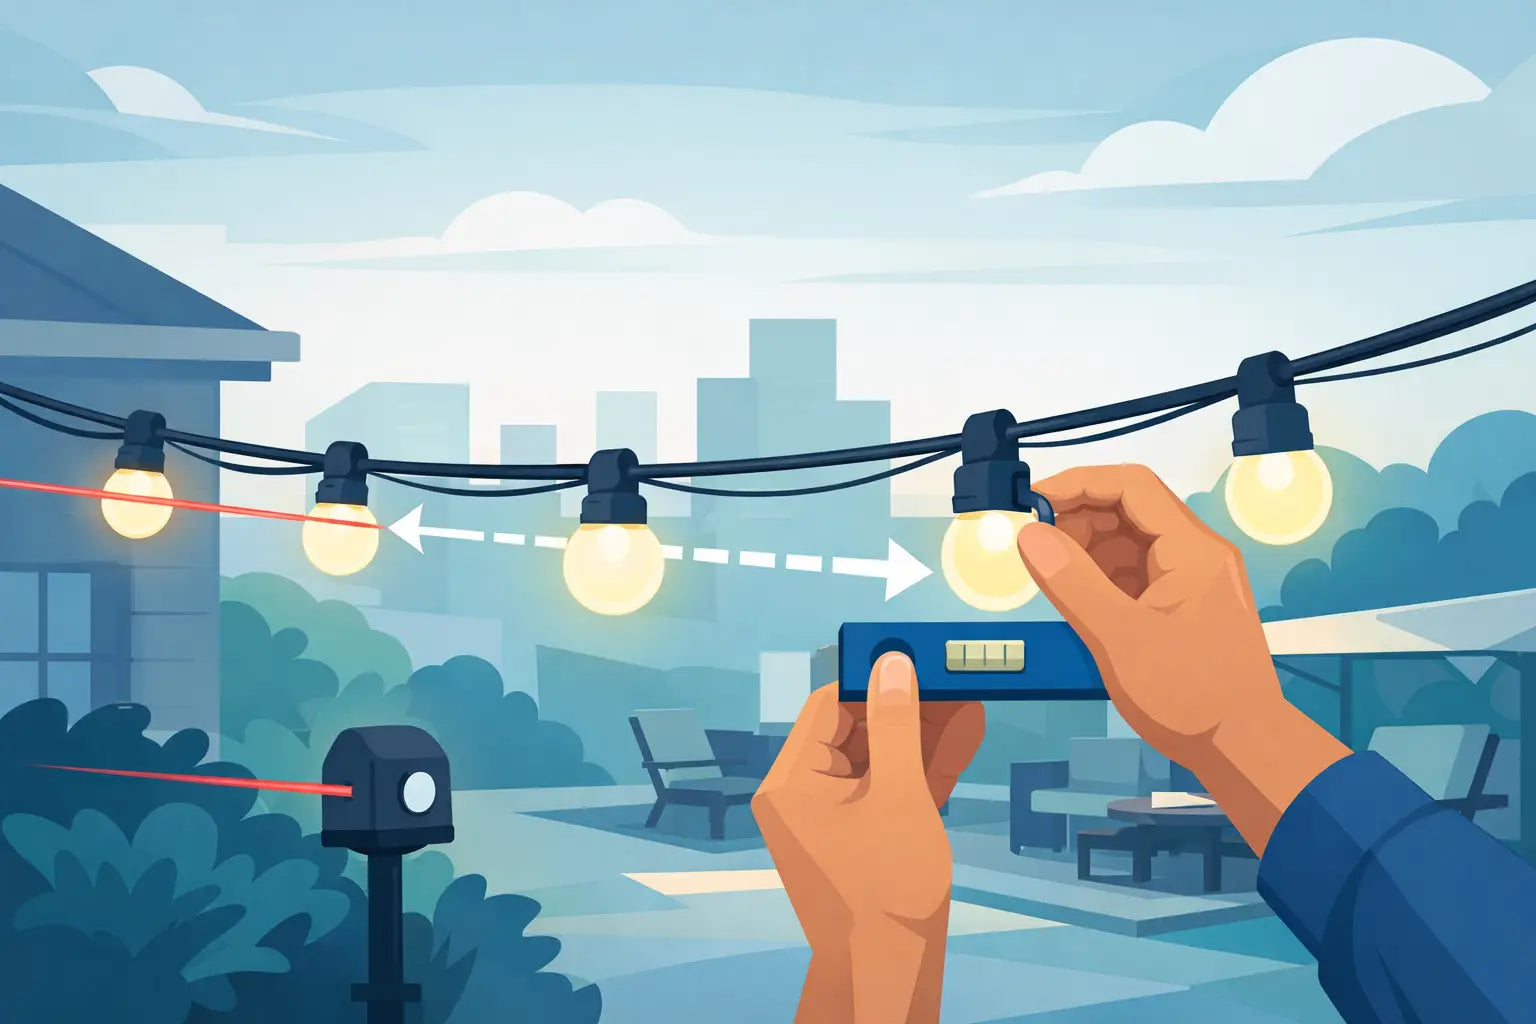
How to align Govee light strings before mounting
The biggest mistake is treating alignment like a final adjustment. In reality, it starts with layout. Before you mount anything, stand back from the house and identify the exact line you want the lights to follow. On most homes, that is the fascia, soffit edge, or another architectural line that already reads as straight from the curb.
Pick one reference point and stay loyal to it. If you follow the fascia for one section and then switch to the soffit edge on another, the run can look crooked even when each individual segment is mounted carefully. Rooflines are not always perfectly square, so your eyes need one consistent visual guide.
It also helps to dry-fit a section before committing. Hold the light string in place with temporary tape or clips and step back. Look at it from directly in front of the home, then from each side. Some alignment issues are invisible on a ladder and obvious from the street.
Measure for consistency, not just fit
A lot of DIY installers measure only to make sure the lights physically fit across a section. That is part of it, but visual consistency matters more. If one segment sits 2 inches from the edge and the next sits 3 inches away, it will read as uneven even if the spacing between modules is technically correct.
Use a tape measure and mark the same offset from your chosen reference line across the entire run. Chalk lines can help on long straight sections, but painter's tape marks often work better when you want clean, visible placement points without leaving residue.
Corners, gables, and peaks need extra attention. These are the places where small errors compound fast. If the line starts drifting before a transition, the angle at the corner will exaggerate it.
What throws Govee light strings out of alignment
The most common cause is inconsistent mounting hardware or surface contact. Factory adhesive may hold at first, but it does not always keep each light locked in the same position over time, especially on textured, dusty, or weather-exposed surfaces. Heat, cold, and moisture can also introduce slight movement, and slight movement is all it takes for a straight run to start looking uneven.
The second issue is rushing the install from the ladder. When you are stretching to reach the next section, it is easy to set one module just a little high or low. That can create a wave effect across the run. You might not notice it until the entire side of the house is finished.
There is also the question of surface condition. Older soffits and fascia boards are not always perfectly flat. If the mounting point varies in depth or texture, the light string can twist slightly unless the mount keeps each module in a repeatable position.
Alignment is partly about angle
Straight placement is only one part of the job. The other is the angle of each light puck. If some lights point slightly outward and others point more downward, the visual pattern at night becomes inconsistent. You may see brighter scallops in one area and weaker output in another, even though the lights are technically in a straight line.
That is why secure, purpose-built mounting matters so much for permanent installs. A mount that controls position and orientation does more than hold the light up. It helps preserve the look you were aiming for in the first place.
A practical method for aligning each run
Start at the most visible section of the house, usually the front-facing roofline. This gives you the best chance to establish a clean baseline before moving to less visible sides. Mark your offset from the roofline edge at several points, then connect those marks visually or with a guide line.
Mount the first few lights slowly. Check each one for both distance from the edge and directional consistency. Once three or four are in place, step down and review the line from the ground. If something looks off now, fixing it is easy. If you keep going another 30 feet, it is not.
As you continue, work in short sections instead of trying to complete the whole run in one pass. That gives you a chance to catch drift before it spreads. On long rooflines, re-measure every few feet. Do not assume the line is still true just because it started true.
When you reach corners or architectural breaks, pause again. Treat transitions as fresh starting points that still need to match the original run. A clean corner looks intentional. A rushed corner makes the whole installation feel improvised.
For peaks and gables, find the center first
Peaks are where many installs go wrong. If the two sides do not mirror each other, the mismatch is easy to spot. Start by finding and marking the center of the peak. Then work outward or upward in a way that keeps both sides visually balanced.
Depending on your home, exact symmetry may not always be possible because of module spacing or wire length. That is normal. The goal is to make the difference invisible from normal viewing distance, not to force a perfect measurement that creates tension elsewhere in the run.
Why mounts make alignment easier
If you want Govee light strings to stay aligned, the mounting method matters as much as the measuring. Adhesive-only installs can work in some cases, but they are less forgiving and less repeatable. When every puck needs to sit at the same distance, angle, and orientation, a dedicated mount removes a lot of guesswork.
That is especially true on outdoor permanent lighting where weather, surface variation, and time all work against alignment. A secure mount helps keep each light where you placed it, instead of letting the string shift slightly over the season. For homeowners who want a more permanent finish, that control is the difference between good enough and done right.
PrintWorks 3D focuses on that exact problem with mounts designed around fit, durability, and easier installation on real homes. The value is simple: better positioning during install and less movement after it.
Small adjustments that improve the final look
If your run is already up and looks uneven, do not assume you need to start over. Sometimes the fix is as simple as correcting one drifting section that is pulling the eye. Step back and identify where the line first starts to wander. That spot is often the true source of the problem, not the section where the unevenness becomes most obvious.
Check spacing from the roofline edge, then compare light angles side by side. If a few modules are rotated differently, correcting those can clean up the nighttime appearance fast. If the issue is sag or twist in the string itself, the remedy is usually more support and better positional control, not just pressing the same adhesive harder.
It also helps to evaluate the install in daylight and after dark. Daylight shows whether the line is physically straight. Night shows whether the light output appears even. You need both.
When perfect alignment is not realistic
Some homes fight you more than others. Older trim, warped fascia, uneven soffits, and patched exterior surfaces can make a mathematically straight line look visually off. In those cases, the best alignment is often the one that looks right from the curb, even if it is not exact at every inch.
That is the trade-off with any permanent outdoor lighting install. You are working with architecture, not a lab bench. A good result is consistent, secure, and clean from normal viewing angles. Chasing tiny measurement perfection while ignoring the real sightline can actually make the finished job look worse.
If you keep one reference line, re-check your spacing often, and use hardware that holds each light in a repeatable position, alignment gets much easier. The install goes faster too, because you spend less time correcting drift and second-guessing every section.
The best-looking Govee installs are rarely the ones done fastest. They are the ones where every light follows the house like it belongs there.
Share:
How to Fix Sagging Outdoor Lights
How to Mount Lights on Fascia Right