

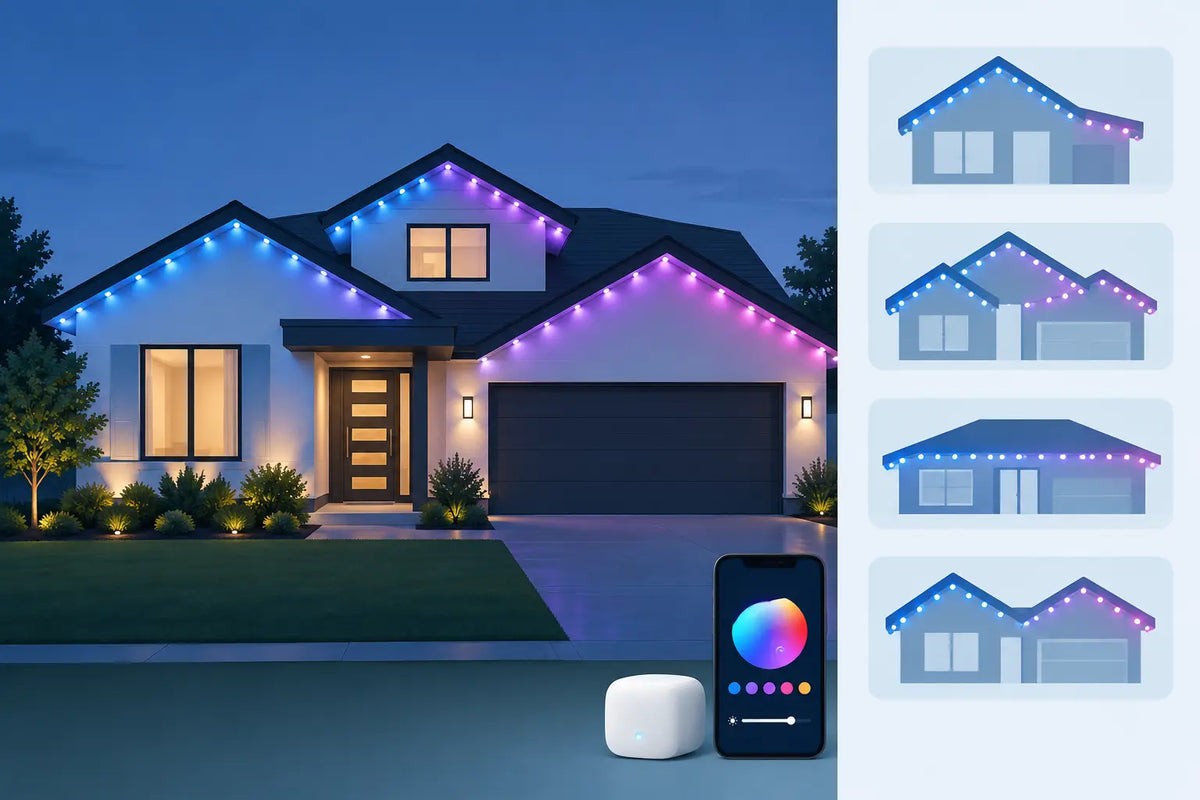
A roof peak can make permanent outdoor lights look custom built, or make every crooked line and loose wire impossible to ignore. This guide to Govee peak layouts focuses on the details that create a clean, secure installation: where the run begins, how lights transition up and down a gable, and how to keep every section aligned through changing weather.
Peak layouts take more planning than a straight soffit run. The angle changes, cable tension changes, and the mounting surface is often harder to reach safely. Get the layout right before mounting anything, and your Govee lights will follow the architecture instead of fighting it.
Start With the Peak, Not the Whole Roofline
A common mistake is measuring the entire front elevation, buying or installing based on the total length, then discovering the peak does not land cleanly with the light spacing. Start by treating each gable or peak as its own section.
Measure from the point where the first light will sit at one lower corner, up to the apex, then back down to the opposite lower corner. Measure along the actual mounting surface, not as a straight line across the face of the house. A flexible tape measure works well for this, especially around trim transitions and uneven fascia.
Then identify three things: the apex location, the factory spacing between lights, and the closest practical place for a hidden cable transition. You are trying to avoid a situation where a light lands awkwardly off-center at the top or a wire must stretch across an exposed section of trim.
For symmetrical gables, begin at the apex when possible. Centering a light at the highest point gives the layout a deliberate look, and it lets you work down each side using consistent spacing. If the system length or cable arrangement does not allow that approach, center the overall visual pattern instead. The goal is not always a light exactly on the peak. The goal is a layout that looks balanced from the street.
Choose the Mounting Surface Before You Measure Final Spacing
Govee peak layouts can be mounted under soffits, along fascia, on trim boards, or on the angled underside of a rake. Each surface changes both the viewing angle and the mounting challenge.
Under a soffit, the lights generally produce a smooth wall-wash effect and remain more protected from direct rain and sun. This is often the cleanest option when the home has enough overhang. On angled rake trim, the lights can follow the outline of the gable more closely, but the fixtures and cable are more visible. That can look great on a sharply defined architectural peak, provided the alignment is precise.
Before committing, stand back at the curb and look at the house from the angles people actually see. A layout that appears centered while you are on a ladder may look shifted from the driveway. Use painter's tape, clips, or temporary marks to show approximate light positions. This small step is especially useful on tall peaks where corrections are time-consuming.
Also inspect the surface itself. Thin vinyl, rough wood, old painted trim, and uneven soffit panels may not hold stock adhesive reliably over time. A purpose-built mechanical mount gives each light a repeatable position while reducing dependence on tape that can weaken in heat, cold, and moisture.
Plan Light Spacing Around the Apex
The apex is the visual anchor of the entire gable. When spacing is uneven near that point, the pattern can look off even if every other light is straight.
Centered light at the top
If your measured run allows a light near the true center, this is usually the strongest layout. Mark the apex first, install that mount, and work down both sides. Keep the fixture orientation consistent so the light cones match from left to right.
This approach works best when both slopes are similar in length and the cable can route naturally toward a power source. It also makes future troubleshooting simpler because each side mirrors the other.
Centered gap at the top
Sometimes the cleanest option is a centered gap with one light equally spaced on either side of the apex. This is not a compromise if it is intentional. On very narrow peaks or designs with a prominent vent, bracket, or trim detail at the top, a balanced gap can look more refined than forcing a fixture into a cramped spot.
The key is equal distance. Do not allow one side to have a short final gap and the other a long one. Your eye will notice it immediately once the lights are on.
Adjusting the first and last positions
Avoid making major spacing changes at the peak to solve a cable issue. A small adjustment at the beginning or end of a run is usually less noticeable than compressed lights near the top. If you need to absorb extra length, do it in a less prominent area, such as a lower soffit section or a corner transition.
Route Cables Where They Will Stay Protected
A clean lighting layout is also a clean cable layout. Plan every wire path before you install the first permanent mount.
Where possible, route cables along protected soffit edges, behind trim returns, or through discreet channels that keep them out of direct view. Avoid pulling cables tight across the face of an angled gable. Tight cable may look neat on installation day, but it can transfer tension to connectors and mounts as temperatures change.
Leave a small amount of controlled slack at transitions, especially where a straight soffit run meets an angled peak. The slack should be hidden and supported, not hanging. Secure cable at intervals so its weight does not rest on the light pods or connector ends.
Think about service access, too. Controllers, power supplies, and connection points should be reachable without removing a large section of the installation. A layout that looks perfect but makes one failed section difficult to diagnose will be frustrating later.
Use Mounts That Keep Every Light Pointing the Same Way
Peaks magnify alignment issues. On a level soffit run, a light that rotates slightly may go unnoticed. On an angled gable, small inconsistencies create a visibly uneven pattern of light on the wall.
Mechanical mounts help establish consistent placement, depth, and orientation from one fixture to the next. They are particularly valuable on surfaces where adhesive has limited contact area or where summer heat and winter freeze cycles can test a long-term installation.
For a permanent outdoor setup, select mounts made specifically for your Govee light series and mounting surface. Pro, Non-Pro, Prism, and Light Curtain products use different housings and require the right fit. Forcing a generic clip onto the wrong light body can cause misalignment, weak retention, or pressure on the cable.
PrintWorks 3D mounts are designed around those product-specific dimensions, giving homeowners a more secure, repeatable install where factory adhesive alone may not be enough. The practical benefit is simple: once the layout is marked, each light has a defined place to sit.
Install in Short, Checked Sections
Do not mount an entire peak in one pass and wait until dark to see whether it works. Install a few lights, step back, and check the line before continuing. On a tall gable, use a second person at ground level to call out drift before it becomes a larger correction.
Check that each pod is seated fully, each mount follows the same edge reference, and the cable exits in a consistent direction. If the peak has two slopes, complete the first few lights on both sides before committing to either full run. This makes it easier to compare symmetry while the work is still manageable.
Test the system before final cable management. Confirm every light responds, inspect for dim or misaligned sections, and view a few different color scenes after dark. Bright white is useful for spotting uneven spacing, while saturated colors make inconsistent fixture angles easier to see.
Account for Weather and the Reality of Exterior Work
Permanent lights live through more than holiday weekends. Heat can soften adhesive, wind can tug at unsupported wire, and moisture can reach every exposed connection. A peak is often one of the most exposed parts of the house, so it deserves the most secure mounting plan.
Install on a dry, clean surface. Remove chalking paint, dirt, and mildew before using adhesive-backed components. If you are fastening mounts mechanically, use the appropriate hardware for the material and avoid overtightening into thin trim.
Ladder placement matters as much as light placement. Do not overreach to preserve a spacing measurement. Move the ladder, use proper stabilization, and work in manageable sections. A clean layout is not worth turning a simple home project into a risky one.
The best peak layout is the one that looks intentional from the curb, keeps wires controlled, and stays put long after the first lighting scene. Take an extra few minutes to mark the apex, test the symmetry, and give every fixture a secure home. That care is what makes permanent outdoor lighting feel truly permanent.
Share:
What Is a Prism Light Mount for Govee Lights?
What Makes Outdoor Mounts Weather Resistant?