

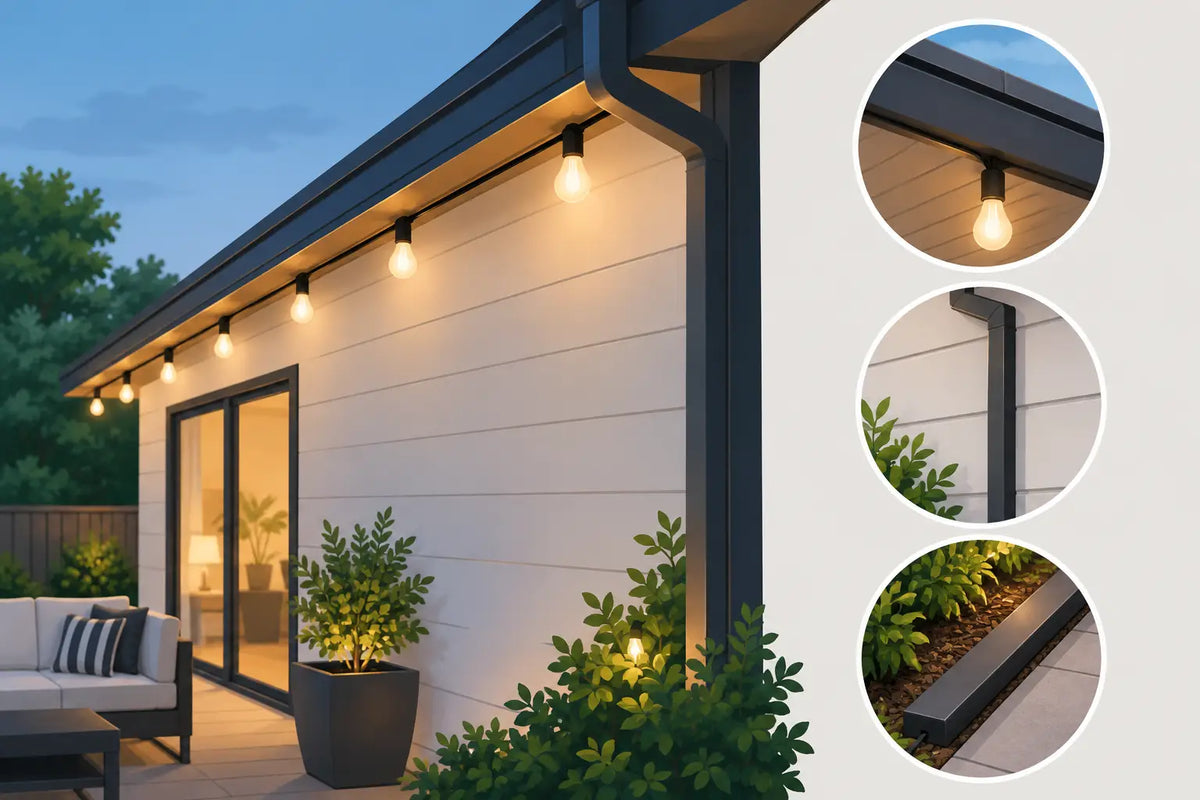
A permanent outdoor lighting install can look incredible at night and unfinished in daylight for one simple reason: loose, visible cable. Learning how to hide outdoor light wires is less about making every inch disappear and more about planning a protected, intentional route that follows the architecture of your home.
For Govee permanent outdoor lights, the cleanest installations treat the wire path as part of the build. Lights stay evenly spaced, cables sit close to the soffit or trim, and the controller and power connections are placed where they can be accessed without becoming the first thing visitors see.
Start With the Wire Route, Not the Lights
Before mounting a single light, walk the full path from the power source to the final run. Look at the house from the street and from the driveway. Your goal is to keep wires on recessed surfaces, behind trim lines, or along edges that are naturally less visible.
For most homes, the best route is under the soffit, along the fascia return, behind a downspout, or along a vertical trim board. These areas give the cable a visual boundary to follow. A wire stretched across open siding, brick, or stucco is far more noticeable than one held neatly at a corner or tucked under an overhang.
Mark the controller location early. It needs to be close enough to a suitable power source and accessible if you ever need to reset, inspect, or service it. Hiding the controller completely may sound appealing, but burying it behind a sealed panel or in an inaccessible attic creates a different problem later. Aim for discreet and reachable.
How to Hide Outdoor Light Wires Without Damaging Them
The best wire-management approach keeps cables straight, supported, and free from pressure. Outdoor light wire should never be pinched behind sharp metal, tightly bent around a corner, or pulled so hard that the connections carry tension.
Begin by removing slack between light sections. A little extra cable is normal, especially at transitions and corners, but long loops hanging below the soffit make even a well-mounted system look temporary. Route that slack back along the mounting surface in a shallow, controlled line. If you need to manage a larger amount, create a neat service loop in a protected, less visible location rather than forcing the cable into a tight coil.
Use mounting points that match the specific light system and the surface you are working on. Stock adhesive can work on a clean, properly prepared surface, but outdoor conditions are demanding. Heat, cold, moisture, dust, and textured soffit materials can weaken an adhesive-only installation over time. A purpose-built mechanical mount provides a more dependable way to hold the light body in alignment while keeping the cable path tight to the structure.
Avoid driving staples, nails, or generic fasteners over the wire. Even if the cable appears intact, a fastener can compress or pierce insulation and cause a failure that is difficult to diagnose. The same rule applies to forcing a cable under siding or trim where it can be crushed as materials expand and contract.
Choose the Right Concealment Method for Your Home
There is no single best way to conceal outdoor lighting wire. The right choice depends on where the run sits, how much cable is visible, and what exterior material you have.
Under-soffit runs
Under-soffit routing is usually the cleanest option for permanent outdoor lights. The cable is naturally shaded, protected from direct weather, and difficult to see from normal viewing angles. Keep each section close to the soffit surface and use mounts that maintain consistent positioning from light to light.
This is especially effective on long rooflines. A clean, straight run looks intentional during the day and helps every light point in the same direction at night.
Corners, peaks, and gables
Corners are where cable management either disappears or becomes obvious. Bring the wire close to the inside corner whenever possible, using the change in plane to conceal it. On peaks and gables, keep the route symmetrical and resist the temptation to cut diagonally across a visible face.
Custom-fit mounts are useful here because they help maintain light spacing and cable direction around angled sections. The goal is not to make the wire vanish through magic. It is to keep it following the home’s existing lines so the eye does not stop on it.
Vertical drops
A vertical drop to a controller, extension, or power source is sometimes unavoidable. Place it on a side elevation, behind a downspout, or along a trim board rather than on the front-facing wall. A paintable exterior raceway can be a practical option when the cable must cross a visible surface.
Raceway is most useful for a single clean vertical run. It can look bulky if used everywhere, so use it selectively. Match the raceway color to the siding or trim, and make sure it is rated for exterior use.
Brick, stone, and stucco
Masonry surfaces demand extra care. Adhesive may not bond consistently to rough or porous material, and drilling is a permanent decision. Whenever possible, route wires along nearby soffit, trim, or a smooth architectural edge rather than directly across masonry.
If a visible masonry route cannot be avoided, use exterior-rated cable management hardware designed for the surface. Do not rely on a loose bead of caulk or an improvised adhesive solution to hold a cable for years of weather exposure.
Keep Connections Protected and Serviceable
Hiding wire is not just an appearance project. It also protects the system from unnecessary movement and weather exposure. Keep connectors tucked under an eave or in another sheltered position whenever the layout allows. Do not leave connection points dangling where wind can move them or where standing water can collect.
Follow the lighting manufacturer’s requirements for extensions, connectors, controller placement, and power supply use. Do not cut, splice, or alter proprietary low-voltage cables unless the manufacturer specifically approves that method. A cleaner-looking route is never worth creating a weak point in the system.
It also helps to plan for future troubleshooting. Leave enough access to identify where one segment ends and another begins. A concealed connection that can still be reached is far better than a hidden connection that requires removing half the installation to inspect.
Mounting Makes the Difference Between Neat and Permanent
Light alignment and wire management are closely connected. When lights sag, rotate, or pull away from the soffit, the cable often follows. That makes the entire run look uneven, even if the wire itself is technically secured.
This is where product-specific mounting hardware earns its place. PrintWorks 3D mounts are designed around Govee light profiles and common installation challenges, helping homeowners secure lights with a cleaner fit than a one-size-fits-all clip. Mechanical support reduces dependence on adhesive alone and helps maintain the consistent placement that makes wires less noticeable.
Choose mounts that fit your specific Govee system and installation surface. Pro, Non-Pro, Prism, Light Curtain, and controller setups have different shapes and routing needs. A mount that fits correctly is easier to install, holds more securely, and avoids the awkward gaps that expose cable or let a light shift over time.
A Daylight Check Catches Most Problems
Once the lights are working, inspect the installation in daylight before calling it finished. Nighttime color effects can hide small routing mistakes. During the day, stand at the curb, then walk along the side of the home and look upward from several angles.
Check for hanging loops, uneven light bodies, cable sections that cross open surfaces, and connectors that need better shelter. Look closely at corners and transitions, where extra wire tends to collect. Correcting a few inches of slack now is much easier than revisiting the whole roofline after seasonal weather has had time to work on the installation.
A clean lighting system should look deliberate even when it is turned off. Keep the wire route close to the home, protect every connection, and use hardware that holds each light where it belongs. The result is a permanent outdoor lighting installation that looks finished from the street and stays easier to maintain over the long run.
Share:
Govee Mount Styles for a Cleaner Roofline
Guide to Roofline Light Durability That Lasts