
A permanent outdoor lighting install can look finished or improvised based on one detail: how each light is held in place. The right Govee mount styles keep pods aligned, protect your spacing, and replace the uncertainty of relying on adhesive alone on a roofline that sees heat, cold, rain, and wind.
For most homeowners, the best mounting choice is not about adding more hardware. It is about matching the mount to the surface, the Govee light system, and the direction you want the light to throw. A purpose-built mount helps turn a string of smart lights into a clean architectural feature that stays put season after season.
Why Govee Mount Styles Matter
Factory adhesive can be useful during installation, but it is not always the long-term answer for every exterior. Soffits may be textured or dusty. Fascia boards can have uneven paint or moisture exposure. On steep peaks and gables, a light that shifts even slightly can interrupt the whole visual line.
A dedicated mount gives each light a consistent position and a mechanical point of retention. That matters when you are working from a ladder and need the install to go right the first time. It also matters months later, when summer heat, winter temperature swings, and exterior movement test every attachment point.
The practical benefits are straightforward: better alignment, a more uniform lighting pattern, easier placement on difficult surfaces, and less dependence on tape as the only thing holding your investment overhead. The best style is the one that fits your exact Govee model and mounting location without forcing a workaround.
Start With Your Govee Light System
Before choosing a mount, confirm whether you have Govee Permanent Outdoor Lights Pro, Non-Pro lights, Prism lights, or Light Curtain lights. These products have different shapes, cable layouts, and mounting needs. A mount that looks close is not necessarily a good fit.
Pro and Non-Pro permanent outdoor lights are the most common roofline installations, but their housings are not interchangeable. Using a product-specific mount helps keep the light seated correctly instead of loose inside a universal clip. That close fit is what keeps the installation looking intentional.
Prism and Light Curtain products need their own approach. Prism lighting is often selected for its distinctive visual effect, so aiming and consistency are especially important. Light Curtain products are installed in a different orientation than roofline pods and benefit from mounts designed around their layout rather than adapted from another product.
If you are adding hardware for a controller or power supply, treat that as part of the system plan, not an afterthought. A protected, well-supported controller setup can make the finished installation cleaner and simplify future access.
Permanent Outdoor Light Mounts for Soffits and Fascia
Soffits and fascia are the two surfaces homeowners use most often, and they call for different decisions.
Soffit Mounts
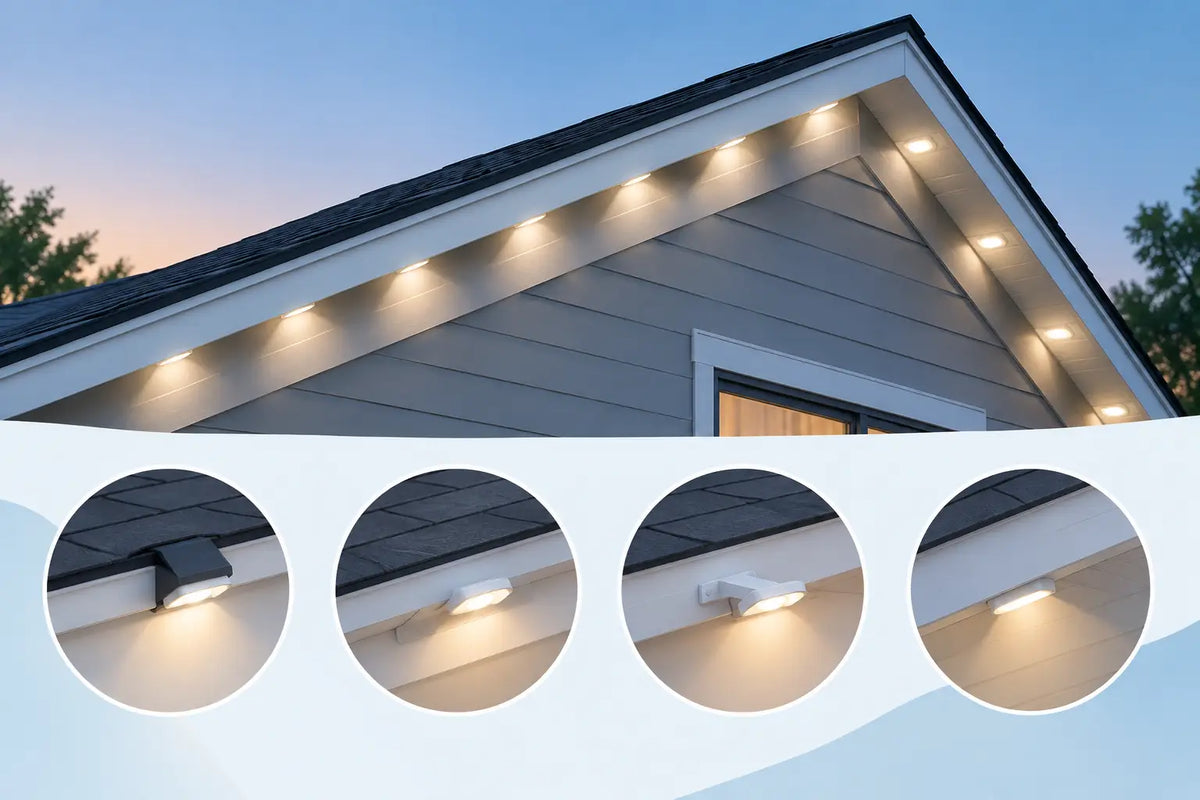
A soffit installation places the lights under the eave, usually facing downward. This creates the familiar wall-wash effect that outlines the home without putting the light source at the edge of the roof. It is a popular choice because the lights are somewhat sheltered and the wiring can be easier to conceal.
The key is consistent placement. Each pod should sit at the same distance from the wall and point in the same direction. A properly fitted mount helps maintain that repeatable position, especially along long runs where a small alignment error becomes obvious after dark.
Check the soffit material before you begin. Vinyl, aluminum, wood, and fiber-cement soffits can behave differently when drilled or fastened. Avoid overtightening hardware, and make sure there is solid material where the mount will be secured. If the soffit is thin or vented, plan the fastener location carefully rather than forcing a mount into a weak section.
Fascia Mounts
Fascia mounting places the lights on the vertical board at the roof edge. This can be the better option when soffit depth is limited, when you want a different light angle, or when the roofline profile makes under-eave placement difficult.
Fascia installs are more exposed to weather, so material quality and a secure fit matter even more. The mount should keep the light stable without pinching the cable or creating a position where water can collect around the connection. A clean cable path also makes a major difference. Keep each run straight, avoid sharp bends, and leave appropriate slack where the system needs it.
Neither placement is automatically better. Soffit mounts often produce a softer, more concealed look. Fascia mounts can be more practical on certain homes and may provide the angle you want for stronger visibility. Your trim design, light model, and desired effect should make the decision.
Gable and Peak Mounting Needs a Different Plan
Gables, roof peaks, and angled trim are where stock mounting methods often become frustrating. The surface angle changes, cable routing gets more noticeable, and every pod must remain visually consistent as the roofline rises.
For these areas, use a mount designed to support the light on an angled run rather than trying to twist or bend a standard solution into place. A mount that sits squarely against the trim helps the light face consistently from one side of the peak to the other. It also reduces the temptation to rely on extra adhesive to correct a poor fit.
Measure the peak before ordering anything. Note the trim width, the angle of the run, and where cables will transition at the top. This is a short planning step that can prevent an awkward gap, misaligned pods, or a cable that is visible from the street.
Prism and Light Curtain Mount Styles
Prism mounts should support both secure retention and the intended lighting angle. Because the Prism effect is more directional, inconsistent placement can create uneven visual results. Mounts made for the product housing help keep every unit positioned the same way across the installation.
Light Curtain mounts solve a different problem. These systems often need stable attachment along a vertical or horizontal edge while keeping the curtain layout tidy. The goal is not simply to hold the product up. It is to preserve an even pattern and avoid sagging, twisting, or unnecessary stress on the wire.
In both cases, resist the urge to use a generic hook, clip, or oversized bracket just because it is available locally. Exterior smart lighting is a long-term installation. A close-fitting mount looks better on day one and gives you more confidence when the weather changes.
Do Not Forget the Controller and Power Supply
The controller and power supply may not be the visible part of the project, but their mounting location affects the quality of the whole installation. Leaving these components unsupported can create cable strain, clutter, and a setup that is harder to inspect later.
Choose a location that is accessible, protected as appropriate for the equipment, and close enough to maintain orderly cable routing. A dedicated power or controller mount keeps components off the ground and off ledges where they can shift. It also gives the installation a more permanent, organized finish.
Plan this before you mount the first light. Identify the power source, map the cable route, and account for where each connection will sit. Trying to solve controller placement after the lights are already installed often adds unnecessary work.
How to Choose the Right Govee Mount Style
The correct mount comes down to five practical questions:
- Which Govee product are you installing: Pro, Non-Pro, Prism, Light Curtain, or a controller accessory?
- Are you mounting to a soffit, fascia board, gable, peak, wall, or another trim surface?
- What direction should the light face to create the effect you want?
- What material are you fastening into, and can it support the selected hardware?
- How will the cable enter, exit, and remain hidden along the run?
PrintWorks 3D designs Govee-specific mounting accessories around these real installation challenges, with weather-resistant materials and fit-focused designs that help homeowners install with more confidence. The goal is simple: less time adjusting lights on a ladder, and more time enjoying a roofline that looks finished.
A permanent lighting system should feel permanent. Choose mounts that match the product, respect the surface, and keep every light exactly where you intended it to be.
Share:
Retrofit Govee Mounts for a Cleaner Install
How to Hide Outdoor Light Wires Cleanly