

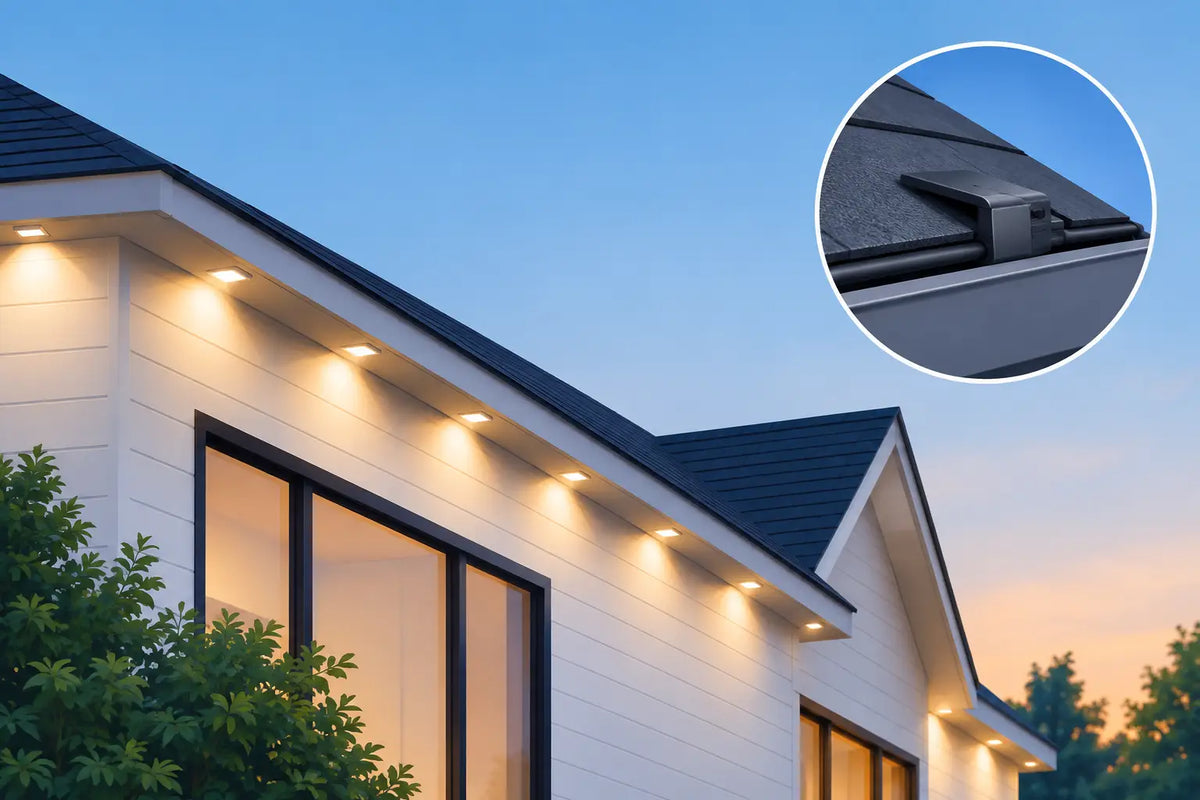
A permanent outdoor light installation can look finished on the first night, then start showing its weak points a few months later. A puck that sits slightly crooked, an adhesive pad that lets go after heat and rain, or a wire run that pulls a light out of alignment can turn a clean roofline into a constant ladder project. This Govee Non-Pro mount review focuses on the part of the setup that is easy to overlook: how the lights are physically held in place.
Govee Non-Pro permanent outdoor lights are a strong option for homeowners who want programmable color, year-round curb appeal, and a more polished alternative to temporary holiday lights. The factory mounting method can work on a clean, smooth surface. But for many soffits, fascia boards, porch ceilings, gables, and textured exterior materials, purpose-built mounts give the installation more security and a more consistent finished look.
What a Non-Pro Mount Needs to Do
A good mount does more than keep a light from falling. It positions each light at a repeatable distance and angle from the wall, soffit, or trim so the color wash looks consistent from one puck to the next. When lights are unevenly spaced or tilted, the effect is noticeable at night, even if it was hard to spot during a daytime install.
For Govee Non-Pro lights, the mount should match the puck shape closely enough that the light does not shift, rattle, or rotate after installation. It also needs a practical attachment method for exterior work. Mechanical fastening adds confidence where adhesive alone may struggle, particularly on painted wood, rough surfaces, older trim, or locations exposed to repeated temperature swings.
The best result is not just a secure light. It is a roofline that looks intentional from the street, with every puck facing the same direction and every wire run supported so it is not carrying tension.
Govee Non-Pro Mount Review: Where It Helps Most
The clearest benefit of dedicated mounts is installation control. Instead of trying to hold a puck in position while managing backing tape, wire slack, and a ladder, you establish the mounting location first. The light then seats into its designed position. That process makes spacing easier to check before the final light run is complete.
This is especially helpful under eaves where the installer is working overhead. Factory adhesive requires good surface preparation and firm pressure at exactly the right moment. A mount reduces the pressure to get that single moment perfect. It gives the puck a physical home and helps maintain the same orientation across long runs.
Dedicated mounts also make sense for retrofit projects. If lights are already installed but a few have begun to sag, rotate, or separate from the surface, a mount can reinforce the problem area without requiring a complete reinstall. That is valuable when the wiring is already routed neatly and the lighting pattern is working well.
There is a visual advantage, too. A closely fitted mount creates a more deliberate transition between the light and the mounting surface. On a clean white soffit, dark fascia, or stained porch ceiling, that consistency matters. Permanent lights should look like part of the home, not like a seasonal product that happened to stay up.
The Trade-Offs to Consider Before Ordering
A mount is not a substitute for planning the entire installation. You still need to confirm your exact Govee light version, count the pucks, map the route, and determine where power and controller components will sit. Non-Pro and Pro systems use different light bodies and may require different accessories. Ordering by product family name alone is not enough if Govee has updated the model or if the listing is unclear.
The mounting surface also matters. Screws can provide a dependable hold, but they create small, deliberate penetrations in the trim or soffit. For most permanent installations, that is a reasonable trade for security. Still, homeowners who are renting, working with delicate materials, or avoiding any holes may prefer to rely on adhesive in low-risk areas and use mounts only where support is most needed.
Color matching is another practical consideration. A mount that blends into white vinyl, black metal, or painted wood can keep attention on the lighting effect rather than the hardware. If the installation surface has an unusual color, a low-profile design is usually more important than chasing a perfect match.
Finally, mounts add a small amount of time upfront. You will measure, mark, and fasten each position before snapping in the lights. That time is usually recovered through fewer adjustments, fewer failed adhesive pads, and a faster path to a straight, repeatable layout. It depends on the roofline, but on a long run with multiple corners, planning the mount positions first is generally the less frustrating approach.
Fit and Material Quality Matter More Than They Sound
Outdoor mounting hardware lives in a demanding spot. It may see direct sun, summer heat, wind-driven rain, freezing temperatures, and the movement that comes from a house expanding and contracting through the seasons. A mount that fits loosely can allow the puck to move over time. A mount made from material not suited for outdoor exposure can become brittle or lose its shape.
That is why purpose-built, weather-resistant mounts are worth considering over generic clips or improvised fasteners. The goal is controlled retention: firm enough to hold the puck in place, but designed around the light so it does not pinch wiring or place unwanted stress on the housing.
PrintWorks 3D designs Govee-specific mounting accessories for this exact use case, with the practical reality of soffits, roof peaks, and exterior trim in mind. The value is not extra hardware for its own sake. It is a cleaner way to make a lighting investment look permanent and stay that way.
Installation Details That Prevent Rework
Before mounting anything, lay out the full light string on the ground or along the planned route. Confirm that the first and last puck locations make sense with your power source, controller location, and any extensions. It is much easier to revise a route before hardware is installed overhead.
Clean the mounting surface, even when using screws. Dust, chalky paint, pollen, and cobwebs make markings harder to see and can interfere with any adhesive you choose to retain as secondary support. Mark the centerline for each puck rather than estimating as you go. A small spacing error repeated across an entire run becomes obvious when the lights are turned on.
When fastening mounts, do not overtighten. The goal is to secure the mount flush to the substrate without distorting it or stripping the fastening point. Then seat each puck and check that the wire exits naturally toward the next light. If the cable has to bend sharply or pull against the puck, revise the mount orientation before continuing.
Pay close attention at corners, gables, and transitions between soffit and fascia. These are the places where wire tension and inconsistent angles tend to show up. Leave sensible slack where the manufacturer allows it, support the cable as needed, and avoid treating the light housing as a cable anchor.
Is a Dedicated Mount Worth It?
For a short run beneath a protected porch on a smooth, freshly cleaned surface, the included adhesive may be all you need. If the lights have stayed aligned through changing weather, there is no reason to add hardware just because it exists.
For a full roofline installation, a textured or weathered surface, a high-wind exposure, or any project where getting back on the ladder is inconvenient, mounts are a sensible upgrade. They provide a repeatable light position, improve the odds of long-term alignment, and reduce dependence on adhesive performance alone.
The strongest installations are built with the assumption that outdoor lighting should not need constant attention. Choose mounts that match your exact Non-Pro light model, plan the route carefully, and fasten them with the same care you would give any visible exterior finish. When the sun goes down, the only thing people should notice is the color on your home - not the hardware holding it there.
Share:
Custom Govee Brackets for a Cleaner Install