

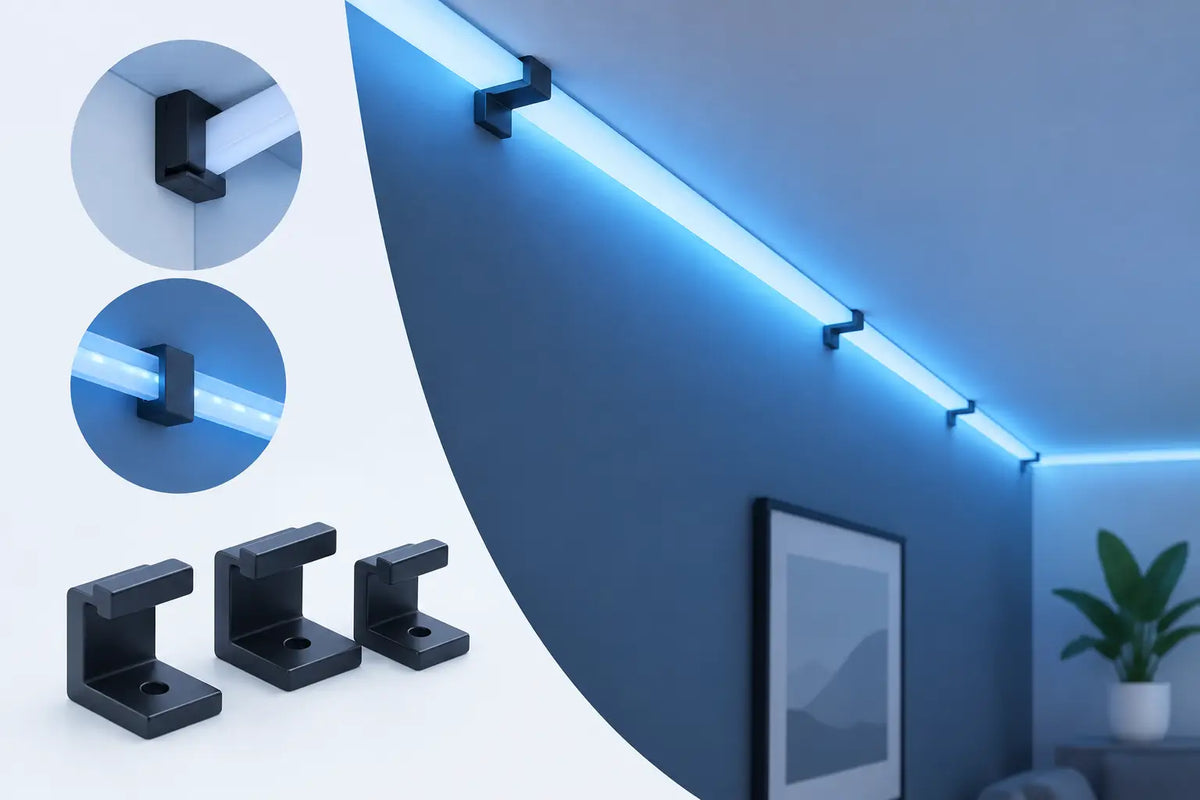
A permanent outdoor lighting project can look polished from the street or unfinished from a few feet away. The difference often comes down to how each light is mounted. Custom Govee brackets give homeowners a secure, purpose-built way to position lights along rooflines, peaks, gables, trim, and other exterior features where factory adhesive alone may not deliver the permanence or clean spacing they expect.
For a system designed to stay up year-round, the mounting hardware deserves the same consideration as the lights themselves. A well-fitted bracket helps protect your investment, keeps every light pointed where it belongs, and reduces the frustration of revisiting loose or crooked sections after the ladder has already been put away.
Why Factory Mounting Options Can Fall Short
Govee permanent outdoor lights are designed to make a major visual impact, but every home presents different installation conditions. Soffit depth, trim profiles, eaves, siding materials, roof pitches, and access points can all affect how easily a light section mounts and how well it holds over time.
Adhesive can work well on a properly prepared, smooth surface, especially for a straightforward installation. But it depends on the material, surface cleanliness, temperature during installation, moisture exposure, and the condition of the mounting area. Textured surfaces, painted wood, vinyl, dusty soffits, uneven fascia, and hard-to-reach angles can all make a simple adhesive install less predictable.
That is where a mechanical mounting solution earns its place. Brackets provide a consistent attachment point for each light, helping hold the line in position through changing weather and seasonal temperature swings. They also make the installation look intentional rather than improvised.
What Custom Govee Brackets Actually Solve
A bracket is not just a small piece of plastic between a light and your home. When it is designed around a specific Govee product, it solves practical issues that generic clips and one-size-fits-all hardware often create.
First, a properly sized mount supports clean alignment. Permanent light installations look best when every puck follows the same line, sits at the same depth, and projects light in a consistent direction. A bracket helps prevent individual lights from rotating, sagging, or drifting out of place.
Second, it adds confidence where adhesive may be questionable. If you are installing lights on a difficult surface, under deep eaves, or in a location exposed to wind, rain, heat, and cold, a secure mount gives you a more permanent foundation.
Third, it helps you work around the architecture instead of fighting it. Roof peaks, gables, corners, and transitions rarely behave like a long, flat soffit run. Custom mounting options let you adapt the system to the home while keeping the finished result clean.
Choose the Bracket for Your Govee System
The right mount starts with the exact product you own. Govee’s Permanent Outdoor Lights Pro, Non-Pro systems, Prism lights, and Light Curtain products have different shapes and mounting needs. A bracket that fits one version may not correctly support another.
Pro and Non-Pro Permanent Outdoor Light Mounts
For permanent outdoor light runs, the goal is usually simple: keep every light secure, evenly spaced, and aimed consistently along the soffit or trim. Product-specific Pro and Non-Pro mounts are built around the dimensions of those light modules, which helps avoid loose fits that can allow movement over time.
This matters most on long visible runs. A slight alignment issue repeated across dozens of lights becomes obvious at night. Starting with a consistent bracket system makes it easier to maintain a straight, professional-looking line from one end of the house to the other.
Prism and Light Curtain Mounts
Govee Prism and Light Curtain lighting create a different kind of exterior display, which means the mounting hardware needs to match the product and placement. These systems may be installed around windows, walls, eaves, patios, or architectural accents where cable routing and orientation affect the final effect.
A purpose-built mount keeps the product supported without forcing an awkward workaround. It also gives the installation a more finished appearance, especially in areas guests see up close.
Power and Controller Mounts
The lights are only one part of the installation. Controllers and power supplies also need a secure, accessible home. Leaving them unsupported can put strain on cords, create clutter, and make seasonal checks more difficult than they should be.
Dedicated power and controller mounts help organize those components in a stable location. The best placement keeps connections protected from unnecessary exposure while still allowing access when you need to check a cable, reset a controller, or make an adjustment.
Weather Resistance Is a Material Question
Outdoor mounting accessories need to do more than look good on installation day. They need to remain dependable through sun exposure, humidity, rain, freezing temperatures, and heat. That is why material selection matters.
Quality custom brackets are made from weather-resistant materials selected for exterior use. They are engineered to hold their shape and maintain a reliable fit instead of becoming brittle, warped, or loose after a season outside. No material is immune to every environment forever, but purpose-built outdoor mounts offer a far better starting point than indoor clips, temporary adhesive solutions, or hardware that was never designed around the light itself.
Installation conditions still matter. Mount to sound exterior material, use appropriate fasteners for the surface, and avoid overtightening. A strong bracket cannot compensate for damaged trim, deteriorated wood, or loose siding. Taking a few extra minutes to inspect the mounting surface can prevent a much larger repair later.
Plan the Install Before You Climb
The fastest installation is usually the one planned at ground level. Before mounting the first light, lay out the run and identify corners, peaks, controller placement, power access, and areas where the architecture changes. Confirm that you have brackets matched to your specific Govee model and enough hardware for the full run.
It also helps to test the lights before they go up. Verify that each section powers on, responds correctly, and reaches the intended coverage area. Once the layout is confirmed, mark your mounting line so the brackets follow a consistent path rather than relying on visual guesses from a ladder.
For most homeowners, spacing and orientation deserve the most attention. A light positioned slightly differently than the rest may not stand out during the day, but it can create a visible break in the nighttime pattern. Brackets make it easier to establish a repeatable position for each module.
Retrofit-Friendly Support for Existing Installations
You do not have to wait for a new lighting project to improve the mounting system. Many homeowners turn to custom mounts after an existing adhesive installation begins to shift, a few lights lose alignment, or they decide the finished look needs more support.
A retrofit-friendly bracket can reinforce an installed system without requiring a complete teardown. The exact approach depends on the light model, mounting location, and condition of the current installation, but the goal remains the same: improve stability while preserving the time and money already invested in the project.
This is especially useful for homeowners who installed lights during a busy season and want to make the setup truly permanent later. Rather than accepting an uneven line or hoping adhesive holds through another year, they can add support where it is needed most.
The Cleaner Install Is Usually the Easier One to Maintain
Custom Govee brackets are a practical upgrade because they solve both appearance and performance issues at once. They help keep lights aligned, provide dependable support, and create a more intentional finish around the exterior of your home. At PrintWorks 3D, that product-specific fit is the point: mounting accessories should make the job easier, not introduce another compromise.
The best bracket choice depends on your Govee model, exterior surface, and installation layout. Match the mount to the light, plan the run carefully, and give every component a secure place to live. You will spend less time correcting small problems later and more time enjoying a lighting display that looks like it belongs on your home.
Share:
8 Govee Controller Mount Ideas That Stay Put
Govee Non-Pro Mount Review for Cleaner Rooflines