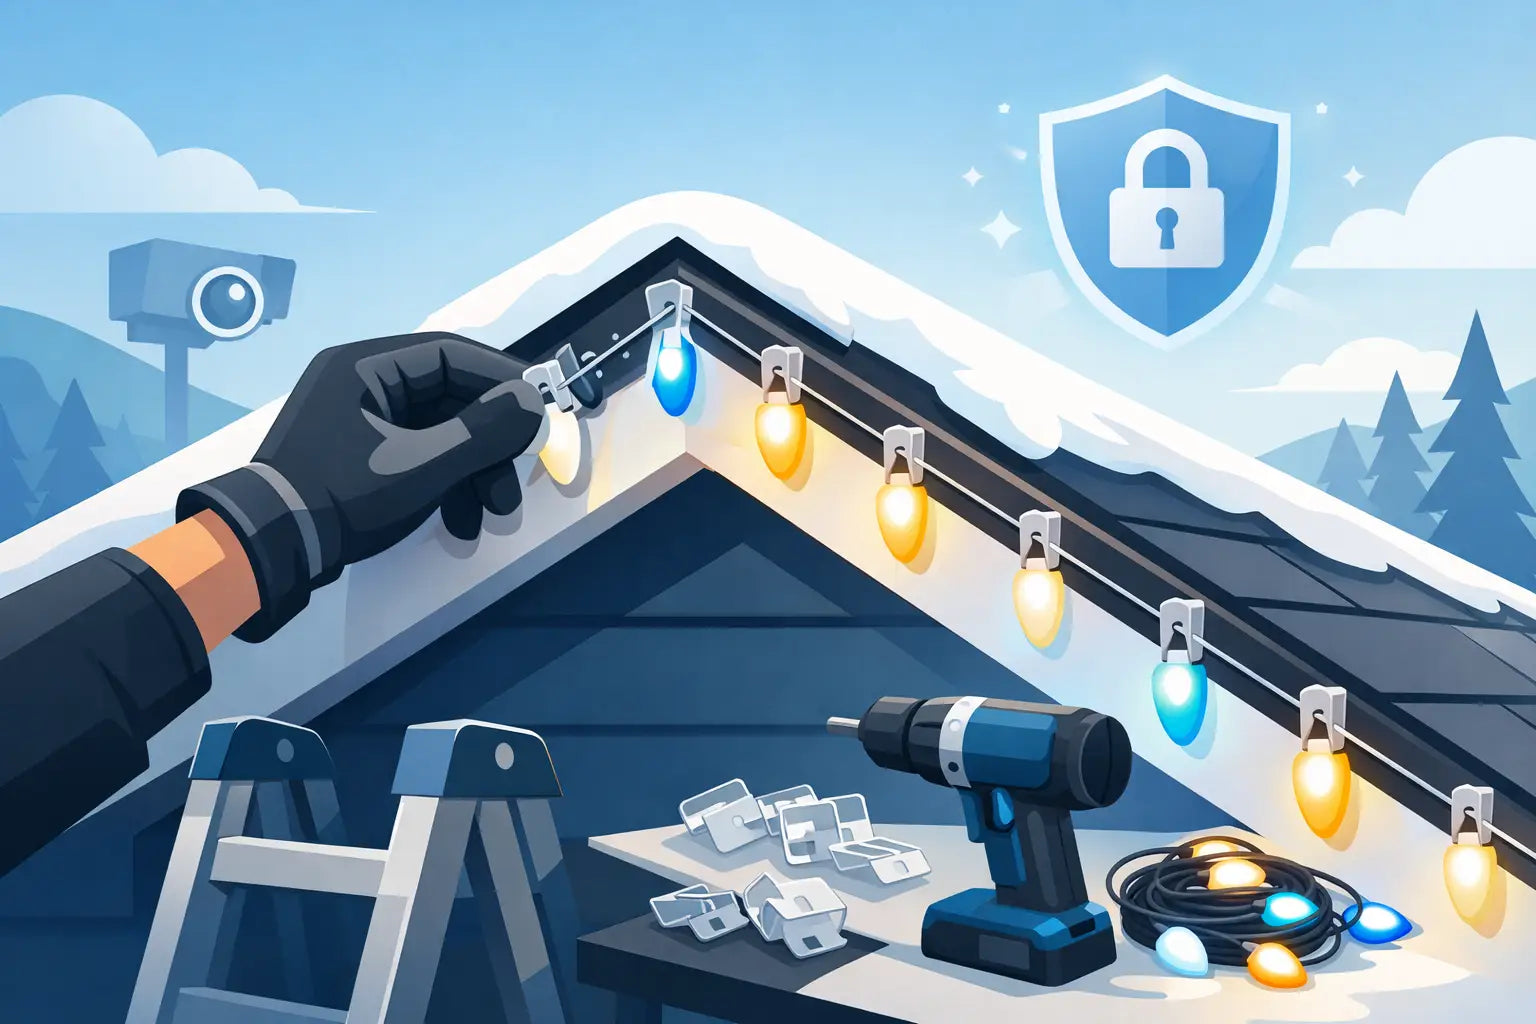
Roof peaks are where a clean Govee install either looks finished or starts to drift, sag, and fight you. If you are figuring out how to secure Govee roof peaks, the real challenge is not just getting lights up there. It is keeping them aligned through heat, cold, wind, and the awkward angles that make peaks harder than straight fascia runs.
A lot of homeowners find this out after the easy sections are already done. The lower roofline goes up fast, then the gable or peak exposes every weakness in factory clips, adhesive backing, and one-size-fits-all mounting. At the peak, small spacing mistakes become obvious, unsupported wire sections stand out, and any loose light can pull the whole line off center.
Why roof peaks are the problem area
Peaks concentrate three installation issues in one place. First, the angle changes quickly, so lights that sit neatly on a flat run can twist or point in different directions as the roofline rises. Second, gravity works against a clean layout. If the mounting method is weak, the wire wants to hang and the light modules can rotate. Third, peaks often get more direct exposure to wind and weather than lower sections.
That is why securing a peak is less about sticking lights to the house and more about controlling position. You want each light held at the intended angle, the wire managed between points, and the transition into the apex supported so it still looks straight from the street.
How to secure Govee roof peaks without relying on luck
The best approach starts with a simple mindset: treat the peak like a special section, not just another stretch of roofline. A straight soffit run can be forgiving. A roof peak is not. It needs more deliberate spacing, stronger mechanical support, and better planning around the top junction.
If you are using only adhesive, you are already accepting more risk than most homeowners realize. Adhesive can help with initial placement, but temperature swings, textured surfaces, dust, and moisture all reduce long-term holding power. On a peak, where the lights and wire are working against the mount angle, that weakness shows up faster.
A more secure result comes from using mounts designed around the actual Govee light shape and wire path. Purpose-built mounts matter because they hold the module in a repeatable position instead of asking tape or a loose clip to do all the work. That becomes even more valuable near the apex, where uneven tension can throw the whole section off.
Start with the surface, not the light
Before mounting anything, inspect the exact material at the peak. Painted wood, aluminum fascia, vinyl trim, and textured exterior surfaces all behave differently. The cleaner and flatter the surface, the more options you have. If the area is chalky, dusty, damp, or uneven, even a decent adhesive setup becomes unreliable.
Wipe the mounting area thoroughly and let it dry completely. If the trim is oxidized or dirty, basic surface prep does more for long-term hold than most people expect. A strong mount on a poorly prepared surface is still a weak install.
Use tighter support spacing near the apex
One of the most common mistakes is keeping the same mount rhythm from the straight run all the way into the peak. That works until the angle steepens. Then the wire can start pulling between lights, and the visual line loses consistency.
Near the top of the roof peak, tighter support usually gives a better result. You are not just supporting weight. You are managing direction and tension. Extra support around the final few lights before the apex helps keep them from rolling or drifting out of alignment.
This is especially true if your roof pitch is steep or the span from one secure point to the next is longer than it looks from the ground. A few inches of unsupported wire can be enough to create a noticeable sag once the system heats up in the sun.
Best mounting approach for Govee roof peaks
For most permanent outdoor installs, the most dependable method is a mount that mechanically holds each light and secures to the structure with a fastening method appropriate for the surface. That does not mean every section needs the same hardware or every house needs the same layout. It means the peak should be built around retention, not convenience.
If you are installing under an eave near a peak, you may be able to maintain a consistent light angle with standard spacing and add extra support only where the geometry changes. If the lights are following a raked fascia or exposed trim up to a gable peak, mount selection and wire control become much more important because every light is visible and every misalignment reads clearly from the curb.
A custom-fit mount gives you three advantages at once. It keeps the light body seated correctly, it reduces the chance of rotation, and it makes your spacing more repeatable. That saves time during install, but more importantly, it protects the finished look after the weather gets involved.
Pay attention to the topmost point
The apex is where installers often rush. They get close to the top, realize the angle is tighter than expected, and improvise. That usually creates one of two problems: a crowded top section with inconsistent spacing, or a loose transition where the wire is carrying more load than it should.
Instead, plan the topmost few lights before you fasten them. Dry-fit the section. Stand back and check sightlines from the driveway or street. On many homes, being perfectly measured matters less than looking visually balanced. If the last few lights into the peak need a slight spacing adjustment to keep the line clean, that is usually the right call.
What you do not want is a final light hanging near the apex with no real support, or two lights pulled too tightly toward each other because the run was not planned around the roof geometry.
Common mistakes when securing Govee roof peaks
A peak install can fail even when the lower roofline looks good. Usually the problem comes down to one of a few predictable issues.
The first is depending on adhesive alone. It may hold for a while, especially in mild weather, but a permanent outdoor system deserves more than a temporary bond.
The second is using mounts that do not match the actual Govee model. Poor fit creates movement, and movement becomes misalignment.
The third is under-supporting the wire path. Even if the light itself is secure, unmanaged wire between modules can pull the layout off line over time.
The fourth is ignoring visibility. Peaks are highly visible architectural lines. Small inconsistencies that disappear on lower runs are obvious at the gable.
How to get a cleaner, longer-lasting result
If your goal is a permanent look, think beyond what will stay up this month. Think about what will still look straight next season. That usually means choosing mounting hardware designed for outdoor exposure, giving the peak section additional support, and installing with appearance in mind instead of just speed.
This is where purpose-built accessories can make a major difference. PrintWorks 3D focuses on mounts engineered specifically for Govee lighting, which solves the fit and retention issues that show up fastest on peaks and gables. When a mount is designed around the actual light body, installation gets more predictable and the finished line holds its shape better.
There is also a practical safety benefit here. The more secure and repeatable your mounting system is, the less time you spend adjusting pieces while on a ladder. That matters on any exterior install, but it matters even more when you are working high on angled sections.
It depends on your roofline
Not every peak needs the same solution. A shallow front-facing gable with wide trim is easier to work with than a narrow, steep peak over a second story. If your mounting surface is broad and flat, you have more flexibility. If it is narrow, textured, or exposed, mount fit and fastening method become less negotiable.
It also depends on whether you are after maximum brightness effect, the cleanest daytime appearance, or the fastest install. Those goals can overlap, but not perfectly. A hidden-looking daytime install often takes more planning. A quick install is not always the one that will hold alignment best at the peak.
The right answer is usually the one that balances appearance, durability, and the realities of your home’s exterior materials.
Final checks before you call it done
Once the peak is mounted, do not judge it only from the ladder. Step back and look at the full roofline from multiple angles. Check that the lights point consistently, the spacing looks intentional, and the wire is not creating visual dips near the apex.
Then give each section a gentle hand check. You are not trying to stress the install, just confirming that the lights are seated, supported, and not relying on tension to stay in place. If something feels loose now, it will not improve after a season of wind and temperature swings.
A well-secured peak should look calm and deliberate, not barely held together. When the mounts fit, the spacing is planned, and the apex gets the extra attention it needs, your Govee lights stop looking like an add-on and start looking like part of the house.
Share:
Permanent Light Mounts That Actually Hold
Govee Mounting Accessories That Actually Hold